In previous blog post I tried to explain scenarios when SCCM OSD Frontends are useful, how to incorporate them into SCCM OSD process and high-level overview of how to create your own frontend or points to keep in mind when choosing Frontends made available by the tech community. I would recommend taking a look at this post before continuing to get better understanding of this article.
In this post I will be focusing primarily on OSD frontend that I have created and how this being used in SCCM OSD Task sequence. Complete source code is available here, feel free to use as-is if suits your requirement. If you are an administrator who loves to code, modify this to suit your requirement.
I have designed OSD Frontend GUI using Windows Presentation Foundation (WPF) UI framework. WPF is part of .NET and uses Extensible Application Markup Language (XAML) to create desktop client applications. The XAML code is then imported into PowerShell script to add functionality to the GUI components.
GUI is created in Visual Studio integrated development environments (IDE), as you must be knowing already Visual Studio provides visual tools for designing desktop applications. You will be presented with an empty form, You just drag-drop control like Button, Textbox, ComboBox, Label, CheckBox, RadioButton etc. All WPF Controls are listed here. You can also modify attributes of these controls within the IDE without writing the actual code, you just draw, resize, modify the controls in GUI mode and in the background IDE takes care of writing corresponding XAML code for you. Here are links to some excellent articles which talk about creating GUIs using Visual Studio and XAML in detail.
Here is how it looks like:
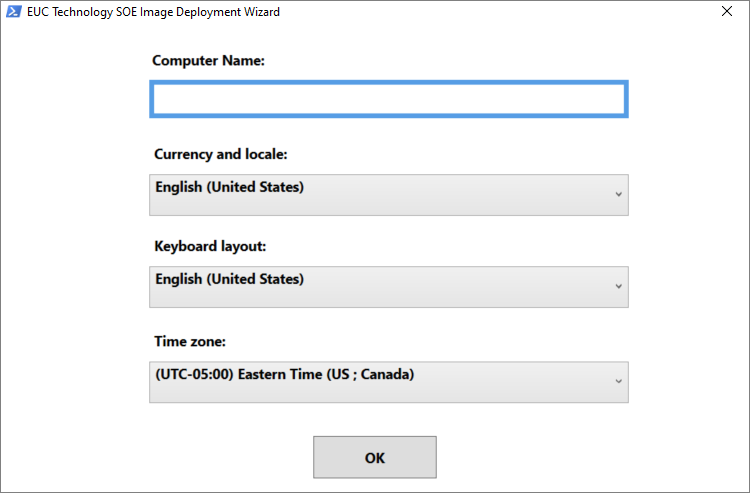
This OSD Frontend takes computer name, locale and Keyboard and Time Zone as input and when “OK” Button is pressed an object of Microsoft.SMS.TSEnvironment is created. Using this Object, values for following task sequence variables will be set based on the input provide and Frontend GUI is closed.
- OSDComputerName
- OSDUserLocale
- OSDInputLocale
- OSDTimeZone
- OSDSystemLocale
As we know computer name cannot be blank or cannot include these special characters and cannot exceed 15 characters.
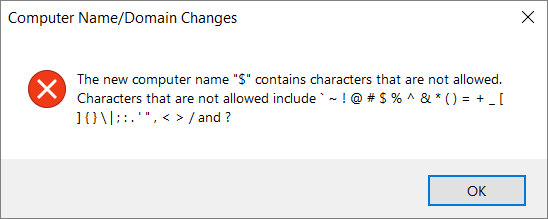
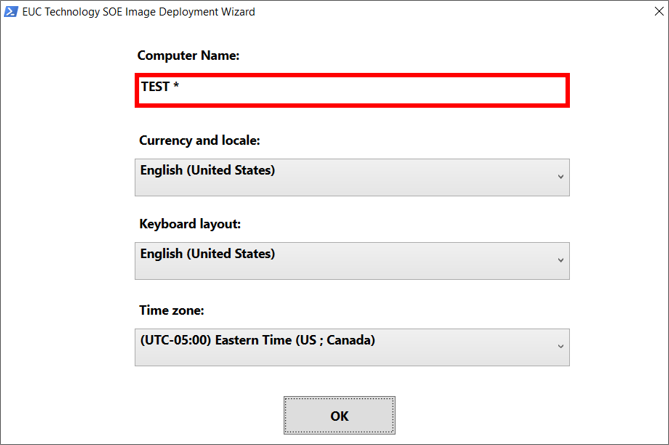
This GUI is configured to accept only valid computer name and highlight the text box in Red for any invalid input. Its essential to validate computer name at this stage else this will cause OS deployment to fail.
How to use this OSD frontend in Task Sequence
Download Script and supporting files from my GitHub Repo, create an SCCM package without creating associated program. Use this package with “Run Command Line” task sequence step and provide this command line:
ServiceUI.exe -process:TSProgressUI.exe %SYSTEMROOT%\System32\WindowsPowerShell\v1.0\powershell.exe -NoProfile -WindowStyle Hidden -ExecutionPolicy Bypass -File SCCMFontEndGUI.ps1
Yes, I have used ServiceUI.exe to launch this GUI, please refer to previous blog post to know more about this tool.
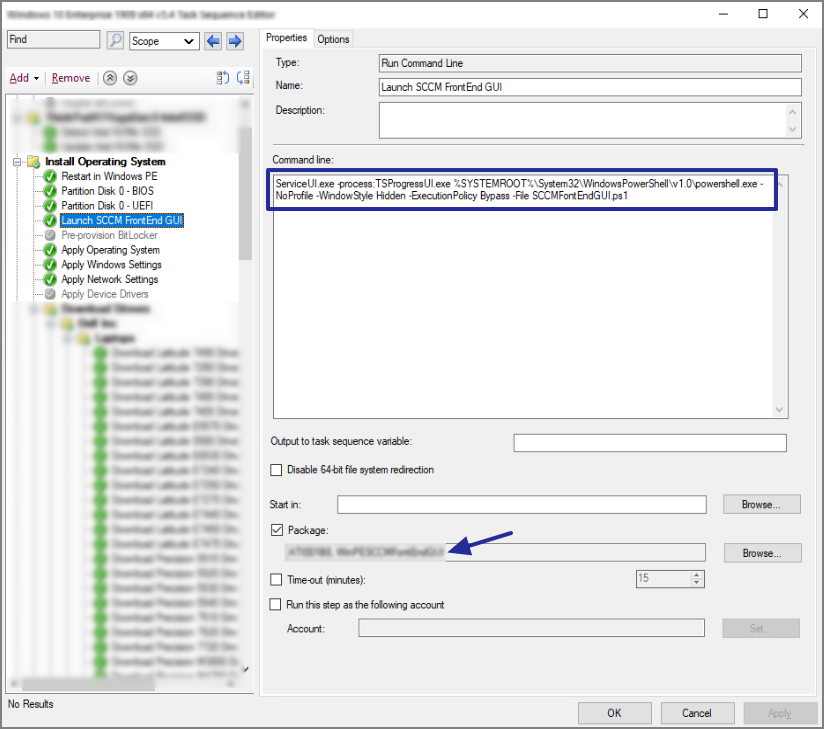
Place “Run Command Line” after Disk Partitioning Task Sequence step, because if placed before it may cause task sequence fail with error code 0x800700A1 when disk has no file system (i.e. disk in not formatted) or formatted with an unknow file system that windows can’t recognize and therefore Task Sequence process in unable to download the package content locally before executing command line.
Next, when Apply Windows Settings step runs, values assigned to task sequence variables are written into the answer file which is later used by Setup Windows and Configuration Manager to apply them as Windows settings i.e. Computer Name, Currency and Locale, Keyboard layout and Time Zone in our case.
I hope this post has been helpful to you. If you have any further questions/comments/feedback, please feel free to reach me out.
Thank you.