Window Autopilot is answer to the question, how can we get a Windows 10 device corporate ready with all configurations, policies, applications without connecting the device to corporate network? Internet based client management and cloud management gateways has been there for quite many years, but it only allows management of the device over the internet, not provisioning of device over internet.
Windows Autopilot simplifies lifecycle of a device (from delivery to retirement of device) as this moves administrators away from the efforts of creating, deploying and managing custom images for various scenarios like wipe-reload, refresh etc. Once a device enters Windows Autopilot lifecycle, the device can be repurposed or assigned to other user with very little efforts from administrators.
Autopilot configured devices can be shipped to the users directly by OEMs, user just has to power on the device -> connect to WiFi -> Enter Azure AD credentials to initiate Autopilot deployment. Rest all configuration tasks are automated. Autopilot devices are deployed and managed with speed and ease of cloud MDM solution i.e. Intune (or any other MDM service), enhancing user experience for Windows 10 deployments.
In this article I will describe how to implement Windows Autopilot and how to provision Windows 10 devices with Autopilot, for User-driven Azure AD joined scenario.
Contents of this article
- Prerequisites
- Licensing requirements
- Software Requirement
- Network Requirement
- Configuration Steps
- Configure who can join device to Azure AD
- Configure Azure Active Directory automatic enrollment (MDM User Scope)
- Assign User with Intune License
- Configure Azure Active Directory custom branding (Optional)
- Configure Enrollment Status Page (Optional)
- Create Windows Autopilot deployment profile
- Registering device for Autopilot
- Assign Windows Autopilot Deployment profile
- Assign user to an Autopilot device (Optional)
- Windows Autopilot deployment in action
Prerequisites
Licensing requirements
At the time of writing this post, these are the licenses required to implement Windows Autopilot
- Microsoft Intune Subscription (or an alternative MDM service subscription/license)
- Azure Active Directory Premium Subscription (For Windows 10 automatic enrollment)
At the time of writing this post, following subscriptions include above mentioned Intune and Azure AD licenses:
- Microsoft 365 Business Premium subscription
- Microsoft 365 F1 or F3 subscription
- Microsoft 365 Academic A1, A3, or A5 subscription
- Microsoft 365 Enterprise E3 or E5 subscription, which include all Windows 10, Office 365, and EM+S features (Azure AD and Intune).
- Enterprise Mobility + Security E3 or E5 subscription, which include all needed Azure AD and Intune features.
- Intune for Education subscription, which include all needed Azure AD and Intune features.
- Azure Active Directory Premium P1 or P2 and Microsoft Intune subscription (or an alternative MDM service)
Software Requirement
At the time of writing this post, Supported version of Windows 10 (1703 or later), following editions are supported
- Windows 10 Pro
- Windows 10 Pro Education
- Windows 10 Pro for Workstations
- Windows 10 Enterprise
- Windows 10 Education
- Windows 10 Enterprise 2019 LTSC
Network Requirement
In general, a good Internet connection is all that is needed. However, it is highly recommended to refer this Microsoft article for the network requirement if internet access is restricted by firewall.
Configuration Steps
Configure who can join device to Azure AD
- Sign in to Azure Portal
- Navigate to Azure Active Directory > Devices > Device Setting
- Under Users may join devices to Azure AD select All and then Save. If you wish to not enable this for all, click selected -> add users or groups.

Configure Azure Active Directory automatic enrollment (MDM User Scope)
Sign into Azure Portal -> Azure Active Directory -> Mobility (MDM and MAM) -> Select Microsoft Intune

Now configure MDM user scope to All MDM user scope -> Click Save. If you do not need to enable this for all click Some -> select Groups. This setting specifies which user’s devices are to be managed by Intune.

Assign User with Intune License
Azure Portal -> Azure Active Directory -> Users
Select the user to assign license -> Select Licenses -> Click Assignments

Now select a License that includes Microsoft Intune License -> click Save

Intune licenses can be assigned group also, from Azure Active Directory -> Groups -> Select a Group -> click Licenses -> Assignments

Microsoft Intune now has its own separate portal, https://devicemanagement.microsoft.com. Intune license assignment can be managed for here as well.
Configure Azure Active Directory custom branding (Optional)
Branding is configured from Azure Active Directory -> Company Branding. A default blank branding profile is already created, you can modify the same or create a new one.

Configure Enrollment Status Page (Optional)
When user sign is to an Autopilot provisioned device for the first time in OOBE phase they are present with a status page that show progress of device enrollment. Though this is an optional step because a default ESP exists but its configured to not show configuration progress during the enrollment. It is recommended to configure existing one to show progress or create new one to provide a better user experience. Enrollment status page (ESP) if configured properly, also ensures device is properly configured before user can access the desktop for the first time. Further details of ESP and benefits of configuring the same are document here.
Sign into Microsoft Endpoint Manager admin center -> Devices -> Windows

Select Windows Enrollment -> Enrollment Status Page
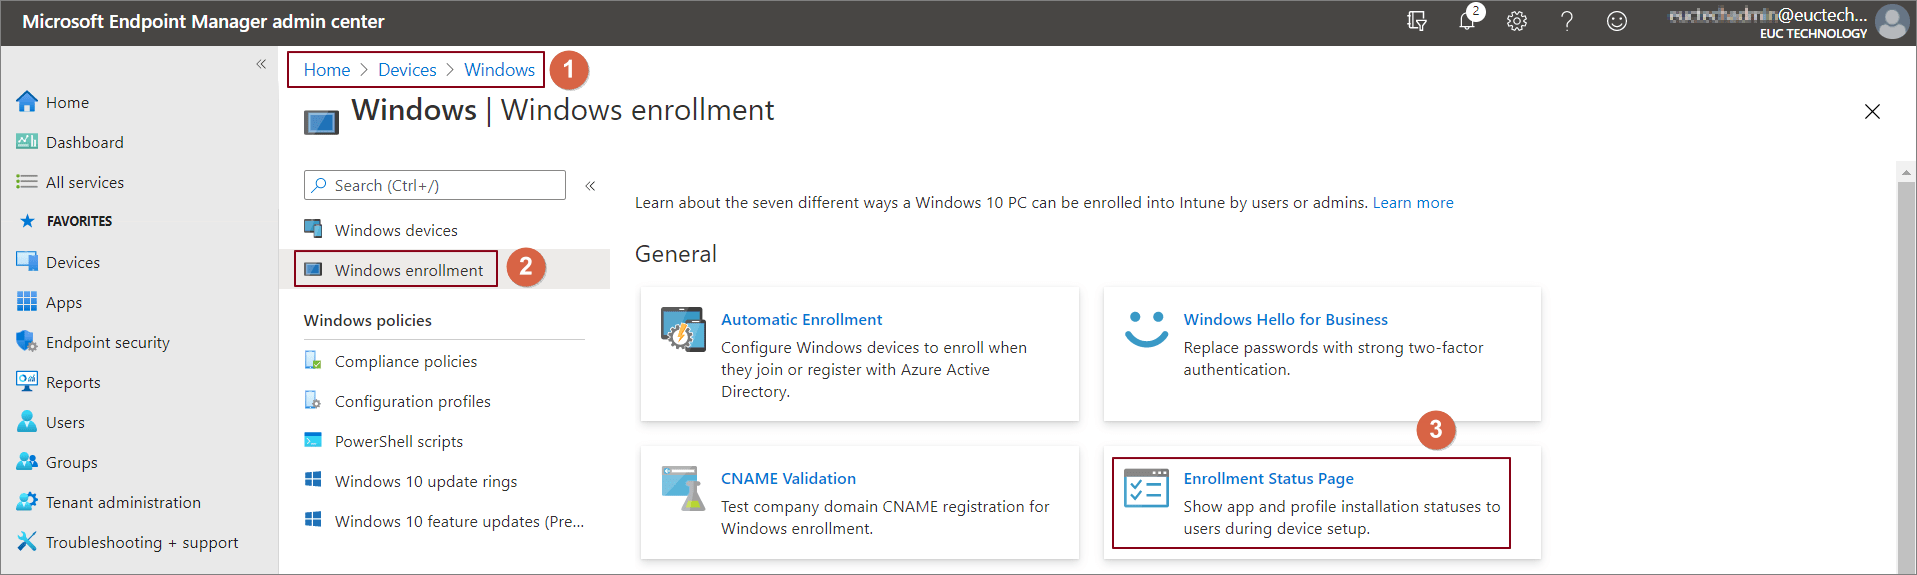
Default ESP exists here however its not configured to show configuration progress to the end user. Click Create.

Give it descriptive Name -> Next

In the setting section, configure Yes to Show app and profile configuration progress. Enabling this setting, provides many configurable settings on you wish to show the users during enrollment.

By configuring following settings is can ensured that device has all minimum required configurations before use can access the desktop for the first time.
- Block device use until all apps and profiles are installed
- Block device use until these required apps are installed if they are assigned to the user/device
Enable Allow users to reset device if installation error occurs, a Reset Device button is displayed in case of installation failure. Using this option use can re-initiate the OOBE experience, i.e. Autopilot process.
Click Next. Assign this ESP page to a group -> Next

Review the settings and click Create


Create Windows Autopilot deployment profile
Deployment profiles are used to customize deployment behavior during out-of-box experience (OOBE) phase of Autopilot devices. We can have multiple deployment profiles with different settings targeted to different device groups. Here is the list of all configurable options available.
Deployment profile can be created via Endpoint Manager admin center as well as Microsoft Store for Business portal. Deployment profiles created using Endpoint Manager admin center gets synced with Microsoft Store for Business.
In this article I will show how to create profile using Endpoint Manager admin center.
To create a deployment profile:
Sign into Microsoft Endpoint Manager admin center. Navigate to Devices -> Windows -> Windows enrollment -> Select Deployment Profiles

Click Create Profile

Enter a descriptive name -> click Next
At this stage by enabling Convert all targeted devices to Autopilot, All corporate owned, non-Autopilot devices of assigned group can be registered as Autopilot device and deployment profile will be applicable to them as well. It may take up to 48 hours for the registration to be processed.
By default, devices manually uploaded as Autopilot devices via Endpoint Manager admin center or Microsoft Store for Business will get this profile applied.

By enabling Apply device name template (requires Windows 10, version 1809 or later), unique names for the devices can be created. During Autopilot device enrollment this template will be used to naming a device. if this setting is not configured device name starts with DESKTOP-
Please take a look at this blog post I have written on various ways a computer name can be set during user-driven Azure AD joined Autopilot deployment.
Configure OOBE as desired and click Next.

Assign deployment profile to a group –> click Next

Review the setting and click Create

Registering device for Autopilot
Devices which are registered with Windows Autopilot deployment service qualify for Autopilot deployment. Deployment profiles created in Endpoint Manager admin center are applicable to registered device only. Ideally, device registration is performed by the OEM, reseller, or distributor. But before they can register devices, organization must grant permission them permission for the same.
Organizations can also register device to Autopilot service by collecting hardware ID and uploading them manually either via Microsoft Store for Business or Endpoint Manager admin center. Alternatively, while creating an Autopilot deployment configure Convert all targeted devices to Autopilot to Yes and target this to a group, all corporate owned non-Autopilot devices member of this group will be registered to Windows Autopilot Deployment Service.
Following are the steps to manually extract Hardware IDs from devices and Register the same to Windows Autopilot:
Launch elevated PowerShell and run following script, this will extract Hardware ID to a csv file and save it C:\HWID with name AutoPilotHWID.csv
md c:\\HWID
Set-Location c:\\HWID
Set-ExecutionPolicy -Scope Process -ExecutionPolicy Unrestricted
Install-Script -Name Get-WindowsAutoPilotInfo
Get-WindowsAutoPilotInfo.ps1 -OutputFile AutoPilotHWID.csv

Following are the steps to Upload Hardware IDs to Windows Autopilot Service:
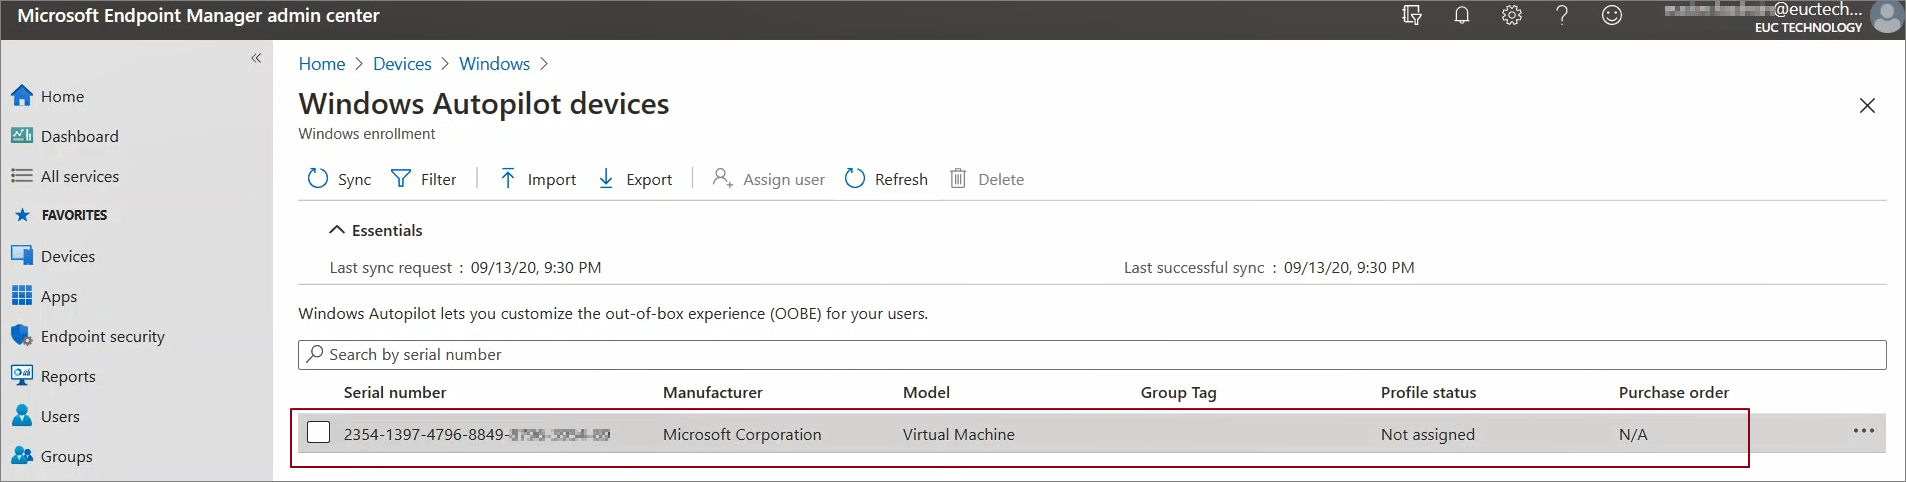
- Sign into Endpoint Manager admin center -> Navigate to Devices -> Windows -> Windows Enrollment -> click Devices

- Click Import -> Browse for csv file containing hardware ID -> click It may take up to 15 minutes for imported devices to be visible here

Here is how it will look after import is successful.
Microsoft Store for Business and Endpoint Manager admin center remain in sync, therefore device Hardware IDs can be uploaded from Microsoft Store for Business as well and device Hardware IDs uploaded from Endpoint Manager admin center will be visible Microsoft Store for Business.
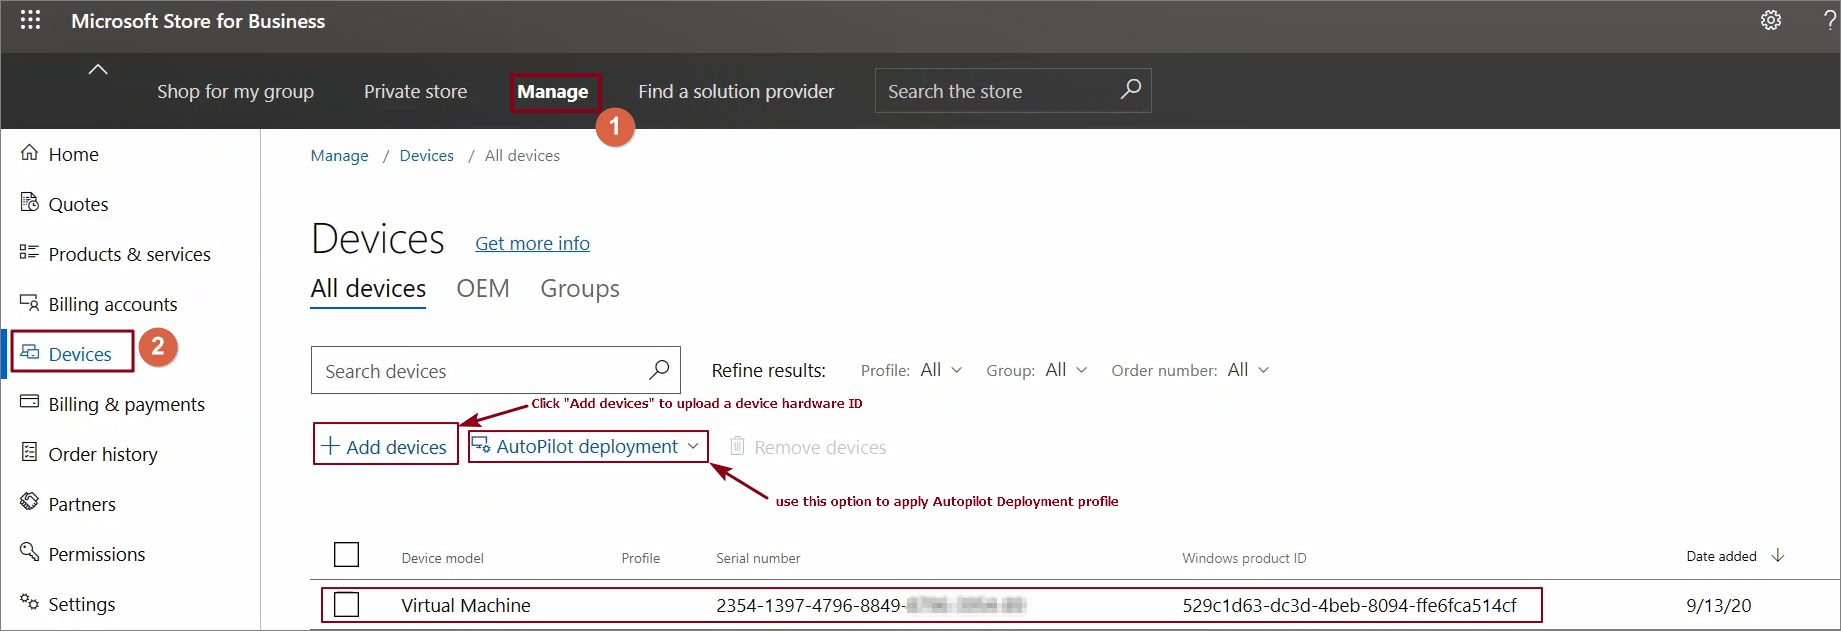
Sign into Microsoft Store for Business -> Manage -> Devices. Here all Autopilot registered device will be listed. Also, device hardware ID can be uploaded here as well.
Using Autopilot deployment option Autopilot Deployment profile can be assigned from Microsoft Store for Business as well.
Assign Windows Autopilot Deployment profile
After device has been registered with Window Autopilot Deployment Service, next step is to assign devices with Deployment profile.
When a device hardware ID is registered to Autopilot service, corresponding Azure AD computer account is created in Azure AD.

To assign deployment profile to an Autopilot registered device, add this computer Azure AD group where Autopilot deployment profile is targeted.
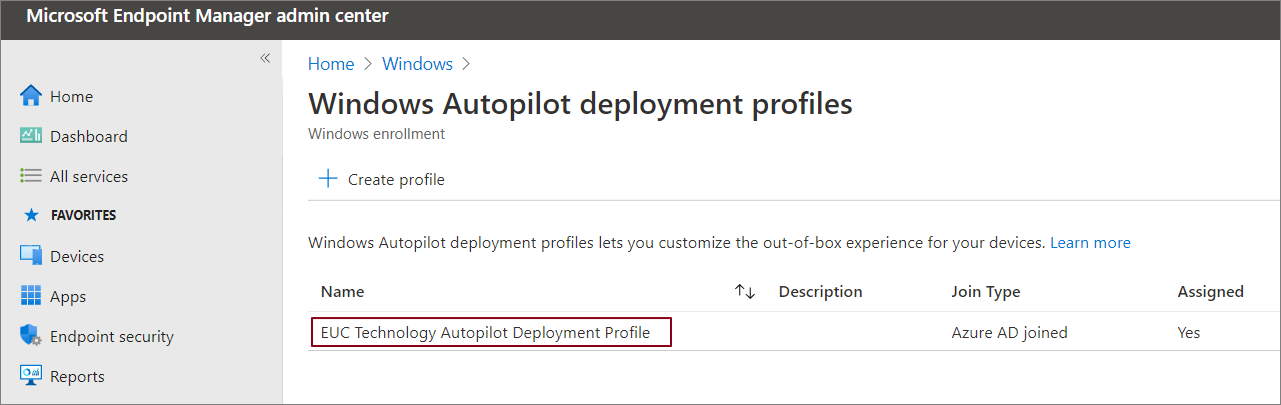
Here is how it will once profile has been assigned:

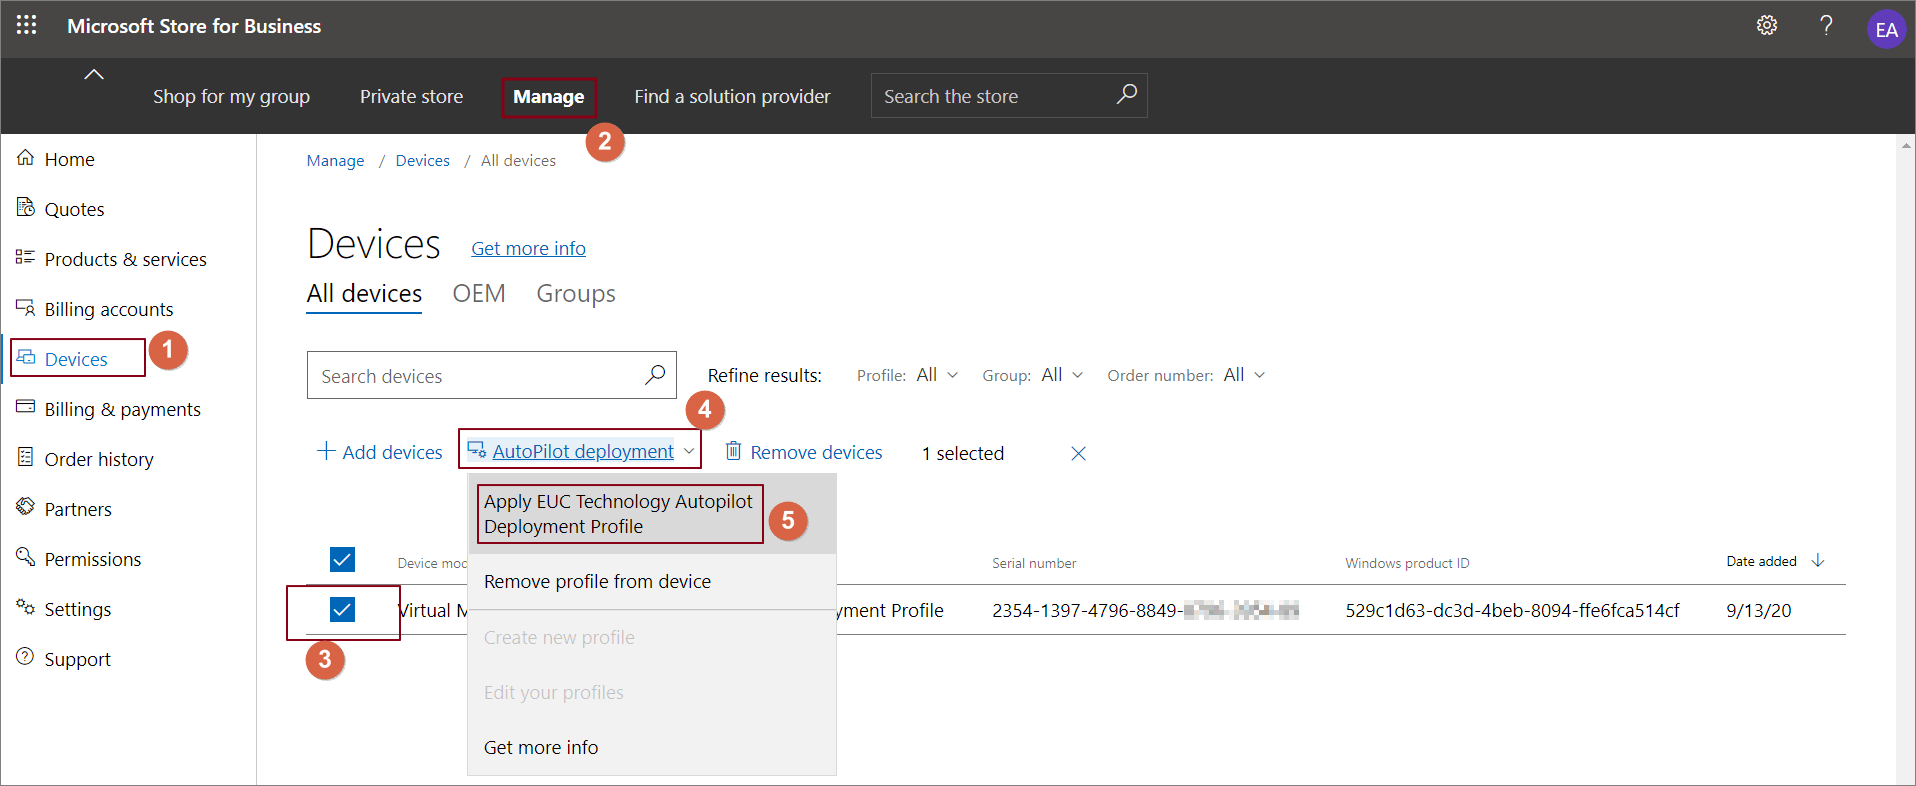
Alternatively, Profile can be assigned from Microsoft Store for Business as well. Sign in Microsoft Store for Business -> Manage -> Devices.
Select the device from the list -> click Autopilot deployment -> Select Deployment Profile
Profile status will appear as Assigned Externally if deployment profile not assigned via Azure AD group membership.

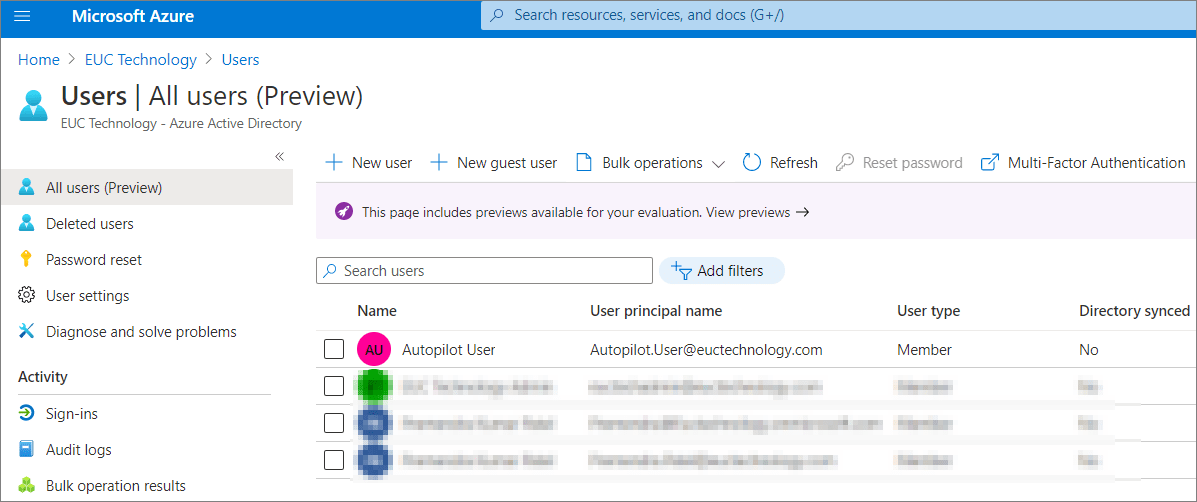
Assign user to an Autopilot device (Optional)
This is optional, however it I would recommend assigning user to an autopilot device as this provides user with more personalized Autopilot deployment experience. Configuring this pre-fills a user from Azure Active Directory during the OOBE phase of Windows setup. Only Intune licensed users can be assigned an Autopilot device from Microsoft Endpoint Manager admin center.
Note:
- Windows 10, version 1809 or later is required for this feature
- Assigning a user to a specific Autopilot device does not work in case of ADFS

Windows Autopilot deployment in action
Based on all the configurations we did, here is how end user experience is going be when user powers on the device:
User selects Keyboard layout


User connects device to Internet

Because we have assigned this Autopilot device to a user, user will get a personal welcome message. User enters the password -> clicks Next

This is how enrollment status page looks, user will see this only ESP is configured to show this progress to the user:


When all assigned policies, configuration and apps are installed user can access the desktop.

Device is joined to Azure AD


I hope this post has been helpful for you. Please feel free to reach out if you have any further questions/comments/feedback.
Thank you.